In-Game Purchases
Summary
This guide will help walk you through the needed steps to setup and configure the ability for an item to be purchasable from the client. You will be walked through the the following steps, to configure an item with a price that can be purchased via API calls.
- Create an Item to use as your In-Game Currency.
- Create an Item that can be purchased with the In-Game Currency.
- Create a Price Point to be able to apply price to Loot.
- Create a Price Break Point on the Price Point to define the exact Price.
- Create a Vendor that contains the purchasable Loot.
- Create a Loot that joins the purchasable Item and the Price Point.
Steps
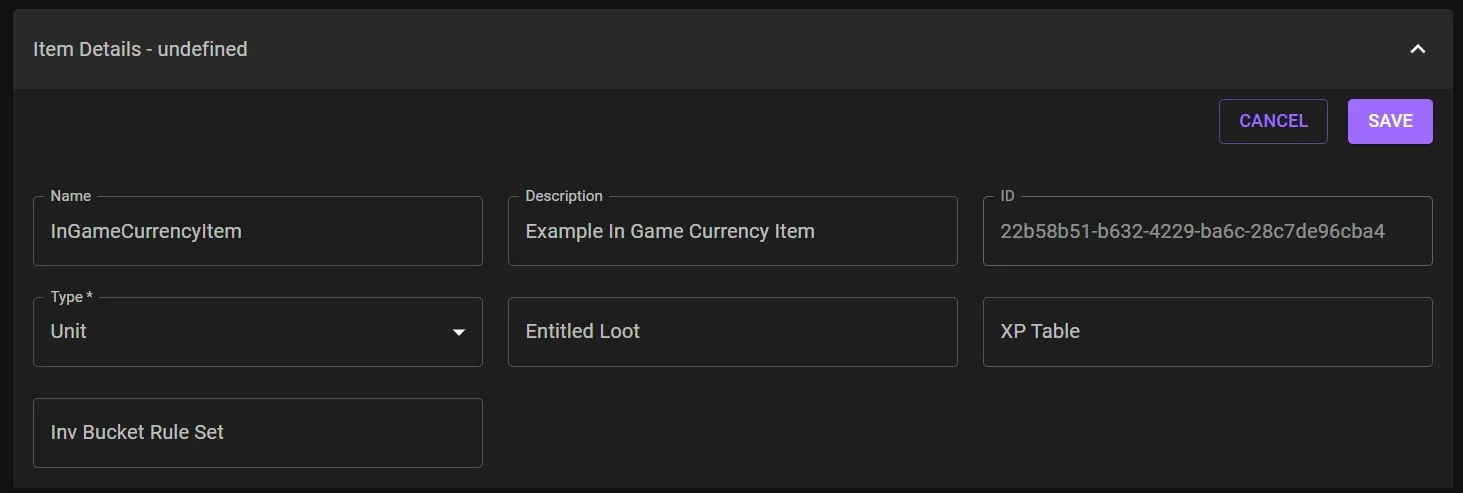
Create In-Game Currency Item
This will be the item that will be used as the payment to purchase other items in game.

- Under the Catalog section navigate to Items.
- Click + NEW ITEM to start the creation of a new item.
- Write a Name for this item.
- This is a Dev Portal visble only field that helps navigating created items within the portal.
- Note: For the rest of this document we will refer to this as InGameCurrencyItem.
- Write a Description for this item.
- This is a Dev Portal visble only field that helps navigating created items within the portal.
- For Type field, select Unit.
- Click SAVE.
After completing this, you should be able to find your new item in the item list of the Items section.
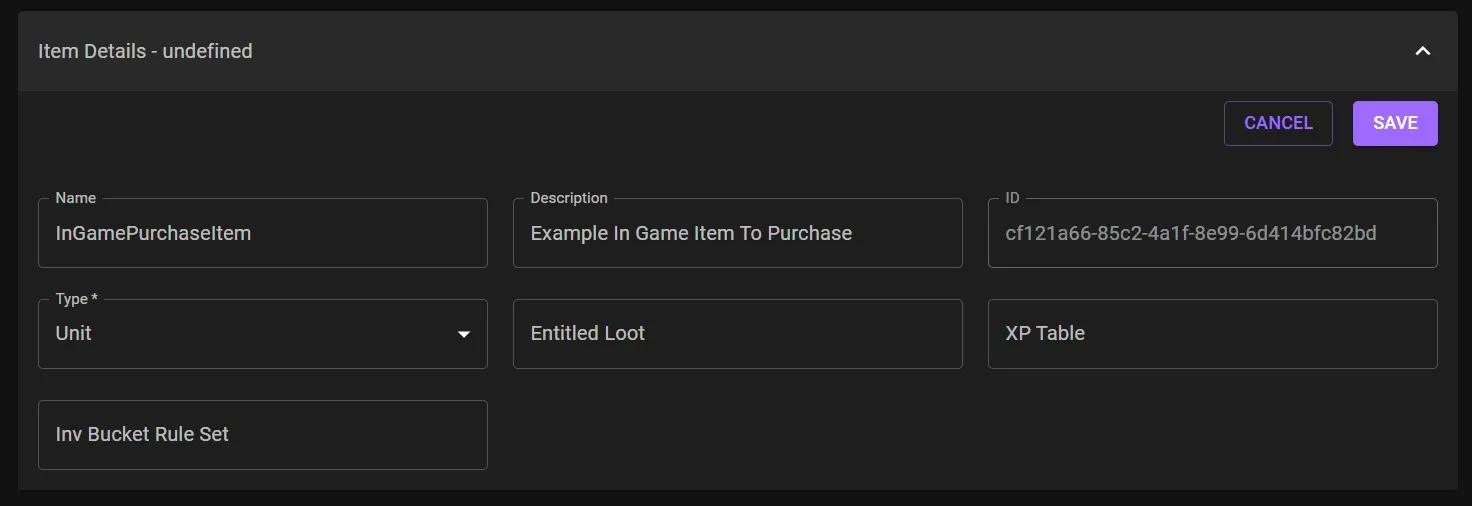
Create In-Game Item To Purchase
This will be an example item that can be purchased in the game.

- Under the Catalog section navigate to Items.
- Click + NEW ITEM to start the creation of a new item.
- Write a Name for this item.
- This is a Dev Portal visble only field that helps navigating created items within the portal.
- Note: For the rest of this document we will refer to this as InGamePurchaseItem.
- Write a Description for this item.
- This is a Dev Portal visble only field that helps navigating created items within the portal.
- For Type field, select Unit.
- Click SAVE.
After completing this, you should be able to find your new item in the item list of the Items section.
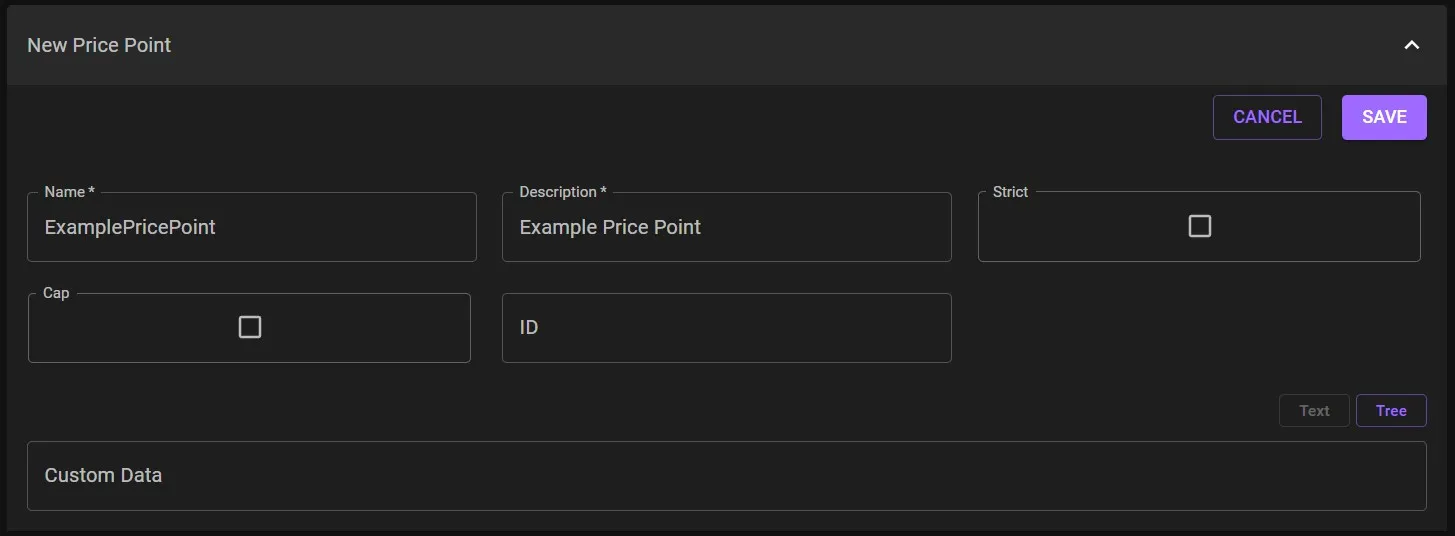
Create Price Point
This acts like a price tag in a store that could be placed on an item. We use this to place the price tag on a given item.

- Under the Catalog section navigate to Pricing Config.
- Click + NEW PRICE POINT to start the creation of a new price point.
- Write a Name for this price point.
- This is a Dev Portal visble only field that helps navigating created price points within the portal.
- Note: For the rest of this document we will refer to this as ExamplePricePoint.
- Write a Description for this price point.
- This is a Dev Portal visble only field that helps navigating created price points within the portal.
- Click SAVE.
After completing this, you should be able to find your new price point in the price point list of the Pricing Config section.
Create Price Break Point on a Price Point
This is the actual price printed on the price tag, a price point can have multiple break points to represent a sale.

- Under the Catalog section navigate to Pricing Config.
- Click on the Price Point you want to add a Break Point to.
- This would be ExamplePricePoint in this example.
- Click + NEW BREAK POINT to start the creation.
- For Type field, select Current.
- For Item field, find your Curreny Item.
- This would be InGameCurrencyItem in this example.
- For Price field, specify how much currency you need to spend on the item.
- If you set this to 250, it would require 250 InGameCurrencyItem to purchase something with this on it.
- For Quantity field, specify the quantity at which this price takes effect.
- Typically this is set to 1.
- You can create multiple price breakpoints using this to allow for discounts for multiple quanties to be purchased at once.
- Click SAVE.
After completing this, you should be able to see your new price break point on the price point.
Create Vendor
This allows for the organization of Loot, which is used by the API to complete purchases.

- Under the Catalog section navigate to Vendors.
- Click + NEW VENDORS to start the creation of a new vendor.
- Write a Name for this vendor.
- This is a Dev Portal visble only field that helps navigating created vendors within the portal.
- Note: For the rest of this document we will refer to this as ExampleVendor.
- Write a Description for this price point.
- This is a Dev Portal visble only field that helps navigating created vendors within the portal.
- For Type field, select Recipe.
- Click SAVE.
After completing this, you should be able to find your new vendor in the vendor list of the Vendors section.
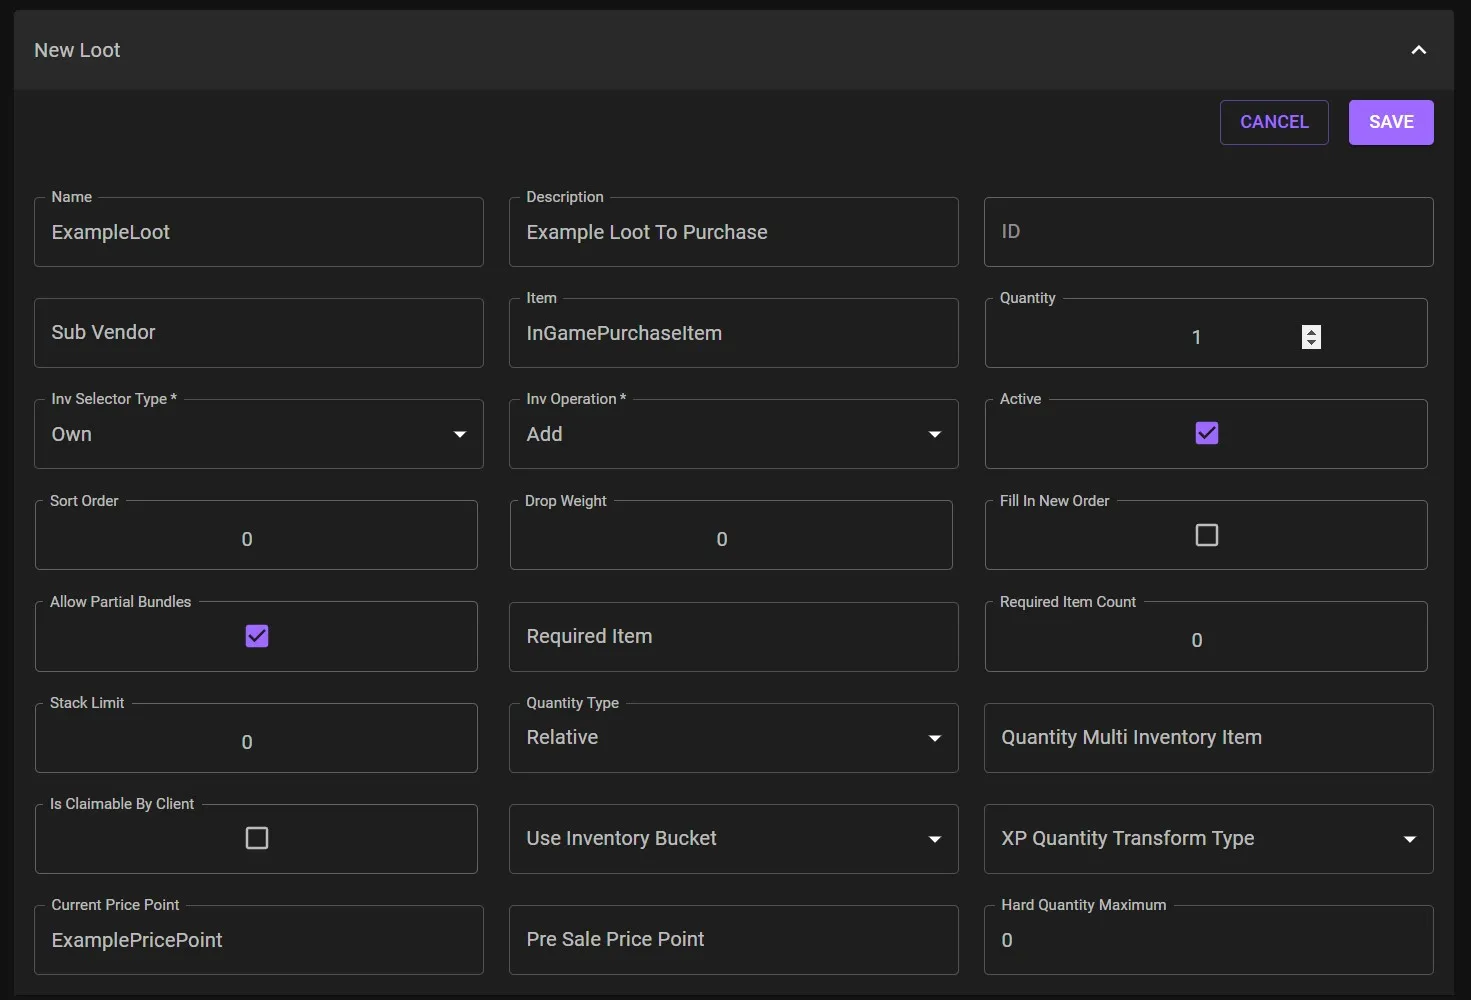
Create Loot in the Vendor
This is the Loot that is purchasable.

- Under the Catalog section navigate to Vendors.
- Click on the Vendor you want to add Loot to.
- This would be ExampleVendor in this example.
- Click + NEW LOOT to start the creation.
- Write a Name for this vendor.
- This is a Dev Portal visble only field that helps navigating created loot within the portal.
- Note: For the rest of this document we will refer to this as ExampleLoot.
- Write a Description for this price point.
- This is a Dev Portal visble only field that helps navigating created loot within the portal.
- For Item field, find your Purchase Item.
- This would be InGamePurchaseItem in this example.
- For Quantity field, set it to the amount of this item they user will obtain.
- For Inv Selector Type field, select Own.
- This makes it so when obtained this is a permanent inventory record.
- For Inv Operation field, select Add.
- This makes it so when obtained this will increate the inventory count.
- For Active field, check the box.
- Setting Loot to active makes it available to be purchased.
- For Current Price Point field, find your Price Point.
- This would be ExamplePricePoint in this example.
- Click SAVE.
After completing this, you should be able to see your new loot on the vendor.